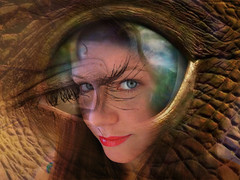
In this blog we will learn how to do some enhancing on flower petals. This magnificent original is from Jenny Romney, titled Blue Powder. One thing I hadn't talked about too much in the previous tutorial with the lifeguard was composition. Jenny has an incredible eye for composition and all of her images are always so well thought out. Go back to the previous Lesson 3A and study her composition closely. Her perspective is so unique and the angle she shot him at makes the lifeguard appear larger than life. His line of sight goes directly to the person sitting in the beach chair, whose leg is pointing directly back at the lifeguard. This person appears to have been waiting for the lifeguard to arrive and the scene really tells a story, to me at least.


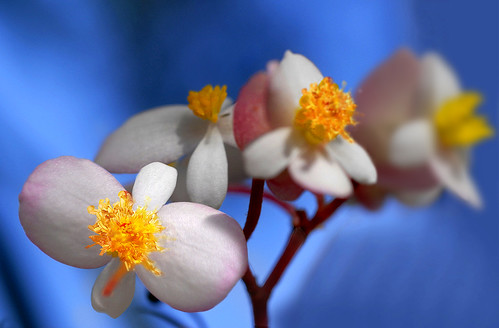
The first thing we do is select the entire foreground blossom alone, as well as the full group in the foreground. We will use the pen tool to create these two paths and name them indiviually. Select the pen tool and create a new path named "blossom" from the path pallet. Begin in the bottom left corner of the petal (screen 1), make your next point approximately halfway into the ajoining arc and pull the handle bars to match this arc as close as possible. Work your way all the way around the petal until you get back to the point where you started (screen 2). Click on this final point to complete and close the path. One thing to keep in mind when creating paths is to begin the path at a corner of the portion you are selecting. Never begin a path in the middle of an arc, it will be quite difficult to finish off the curve without having a flat spot.

Is your path perfect?.... cool! If it needs some adjusting, just
edit the points with the white cursor (refer to Lesson 4 for more


understanding of the pen tool). You will notice on the second screen shot that I added some space around the blurred edge. That helps in feathering in a good edge. Paths are always easy to edit and adjust to fit things very well. Even if you missed a bit going around, that is okay. Just edit the point to fit better, and continue on.


I added new petals from my selections, as well as a bolder and brighter stamen. This was also done on several layers. As you can see, having it on many seperate layers allows you to change all or some of the layers for different effects......

flickr HiveMind | 4Deanna(recent uploads)
http://fiveprime.org/hivemind/Tags/4Deanna/Recent
flickr HiveMind | MyFoxBoston(recent uploads)
http://fiveprime.org/hivemind/Tags/MyFoxBoston/Recent
__________________________________________________________
Stairway to Heaven GrfxDziner.com

Deanna Cremin Memorial Foundation | Recent Uploads
July 6, 2019, 6:00pm


![gothic [American]](https://live.staticflickr.com/65535/48222580747_f5df397491.jpg)


![egret2a [GrfxIntroSWF]](https://live.staticflickr.com/153/335649894_87c59b4945_m.jpg)