Saturday, December 11, 2010
As soft as a feather...
For that edit I did most of the same things I do for portrait work. I used the lasso tool for selections, and the pen tool for the initial selection of the model. That selection is just the outline of the model, and I find the pen tool does that the best. As I have mentioned in other places, it makes a very crisp edge and sometimes to crisp for that portion of he photo. For the quicker selections once the subject has been isolated, are easily done with the lasso tool. The feather amounts always change too depending on what portion of he portrait, and how precise you need an edge.
To show you a dramatic difference of the finer edge to a softer one, look at these variations of the initial work. Each has also had a graphic treatment done to the underlying background image. The first example use the Graphic Pen effect, and the second usses a Concentric Circle. See how the thickness of the concentric circles create the tone...
....and do you see how softly the textures blend into the subject? That feather amount is about 300 pixels on the full size edit. It started as a quick selection using the lasso tool. I roughly followed the contour of he subject, and it didn't have to be precise at all because of the very strong feather amount applied.
The effect of having a precise edge on one side contrasted with an extremely soft edge on the other is something that can be used in combination with illustrations, or paintings. It tends to give the illusion of the subject falling into the painting, or coming out of a illustration. Take a look at these screen caps to see the layer stack...
You can see the same type of contrasting feather work in this poster for the Sundance Film Festival. It was for an online contest back in 2006, just for fun. Look at the very soft edge where the sky meets the globe, the text for the title also has some very soft feathering, and on a couple layers...
flickr HiveMind | MotherChildSeries
http://fiveprime.org/hivemind/Tags/MotherChildSeries
flickr HiveMind | 4Deanna(recent uploads)
http://fiveprime.org/hivemind/Tags/4Deanna/Recent
__________________________________________________________
Stairway to Heaven GrfxDziner.com
| Articles on Deanna Cremin... Somerville, MA
Saturday, November 13, 2010
Shine on ruby2sday...
I will buy you a garden, where your flowers can bloom...
I will buy you a new car all shiny and new...
...Yes, I will.
The Mustang in the photo above has the headlights turned on by using one of the light modes in Photoshop. That one was the lens flare, and I just had the lens portion of the headlight selected when applied. It makes it appear they were on for the photo. Often times you have to add light back into a photo for one reason or another. The second photo uses the Multiply and Soft light layer options to help with the sky and overal lighting. There are always descriptions of the work when you click on the photo. It will take you to flickr where the steps I used are int eh comments.
The next photo below, as well as the first photo in the blog, were completely reworked and the background only had new lighting applied with the Lighting Effects Filter.
Using the Lighting Effects Filter will allow you to recreate many theatrical lighting scenarios. It is a powerful feature that definitely takes time to learn well, but there are many things that can be done simply, and right off the bat. The image below had some symmetrical things fixed, and then I I isolated the lamp portion. I copied this to a new layer, and then relit the background on the layer below with a Radial style light, and centered to the lamp...
That Jade CD design is also done with fairly simple lighting effect. I almost always isolate the subject somehow and the apply lighting differently to the foreground and background. That technique will add more depth to your shot and make it look natural too. Here are a couple screen caps that have more info on the filter:
Those two screen examples use a spotlight, which is a litle more difficult to understand. There will be another blog on just that one light as it invlovles the understanding of planes and ellipses. Start with something simple like the Lamp with the Blue sky.
Deanna Cremin Memorial Foundation | Recent Uploads
flickr HiveMind | 4Deanna(recent uploads)
http://fiveprime.org/hivemind/Tags/4Deanna/Recent
__________________________________________________________
Stairway to Heaven GrfxDziner.com
| Articles on Deanna Cremin... Somerville, MA
Sunday, October 31, 2010
Hallows' Eve...
See how the texture applies to only the background in the above example? See it done below too, and with a smaller texture that covers a much larger area. Some have very soft selections created with feathering, others us the Lighting Effects Filter to establish a very soft application of light. They were all done in one same way, using multiple layers...
Deanna Cremin Memorial Foundation | Recent Uploads
__________________________________________
Justice for Deanna Cremin
the UnSolved Murder of Deanna Cremin...
aired on Fox25 News
by, Investigator/Reporter Bob Ward...
Saturday, November 11, 2006 (5PM; 6PM; 10PM; 11PM) - Thank You!!
__________________________________________________________
Stairway to Heaven GrfxDziner.com
| Articles on Deanna Cremin... Somerville, MA
flickr HiveMind | MyFoxBoston(recent uploads)
http://fiveprime.org/hivemind/Tags/MyFoxBoston/Recent
NOTE: Code for missing video FOX25 News...
param value="&skin=MP1ExternalAll-MFL.swf&embed=true&adSrc=http%3A%2F%2Fad%2Edoubleclick%2Enet%2Fadx%2Ftsg%2Ewfxt%2Fnews%2Fcrime%2Fdetail%3Bdcmt%3Dtext%2Fxml%3Bpos%3D%3Btile%3D2%3Bsz%3D320x240%3Bord%3D68113945670865096%3Frand%3D0%2E8917723775461417&flv=http%3A%2F%2Fwww%2Emyfoxboston%2Ecom%2Ffeeds%2FoutboundFeed%3FobfType%3DVIDEO%5FPLAYER%5FSMIL%5FFEED%26componentId%3D1369590&img=http%3A%2F%2Fmedia2%2Emyfoxboston%2Ecom%2F%2Fphoto%2F2009%2F01%2F15%2FmyFoxBoston%5F20090115143157383%5F640%5F480%2EJPG&story=http%3A%2F%2Fwww%2Emyfoxboston%2Ecom%2Fdpp%2Fnews%2Fcrime%5Ffiles%2FUnsolved%5FJustice%5FFor%5FDeanna%5FCremin" name="FlashVars"param value="all" name="allowNetworking"/param value="always" name="allowScriptAccess">
...it went missing in 2009. Zero help, ever.
Labels:
DCMemorialFoundation,
GrfxDziner,
Halloween,
Hallows' Eve,
layers,
learn,
texture
Sunday, August 29, 2010
greenRoom…
Peta Evans-Taylor | Hold On
imagery/editing from gwennie2006 • YouTube™
Used with permission from Peta's Out of the Darkness CD.
Often times you can add some texture through additional layers, and especially when the original photograph is shot with some sort of texture behind it. In greenRoom I applied several layers and all blended into the previous layer beneath it with a light blending mode,
such as screen, multiply, etc. I did select the subject first and used the Pen Tool to get the most accurate edge. It is also quite qwick with the Pen Tool and completely editable if you need to tweak it some.
Following are a couple other pieces from the Deanna Cremin Memorial Foundation as well as a few pages from the introducttion to the Power of Art, from gwennie2006...
Automatic Download of 8-Page tutorial in .PDF format:
Introduction | the Power of Art | 44 MB PDF file • GrfxDziner.com
For some similar techniques for a different style of textured, you can have a look at these examples. Each is much better explained in the blog written about each of the edits. The indivisual blog links are below the images...
Check out these blogs too from the
Deanna Cremin Memorial Foundation:
GrfxDziner.com | Texturized • Cabin Fever…
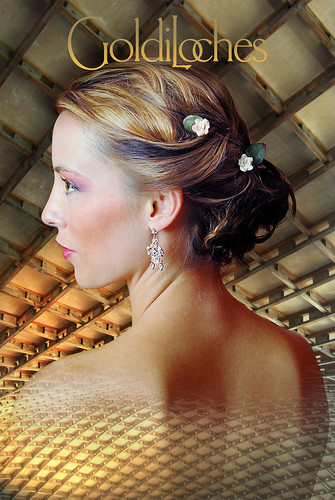
GrfxDziner.com | GoldiLoches • Out of the Woods…
____________________________________________
Deanna Cremin Memorial Foundation | Recent Uploads
~Candlelight Vigil~ Deanna Cremin
Investigator/Reporter - Bob Ward
My Fox Boston | Fox25 News - Monday, March 29, 2010
flickr HiveMind | MotherChildSeries
http://fiveprime.org/hivemind/Tags/MotherChildSeries
flickr HiveMind | 4Deanna(recent uploads)
http://fiveprime.org/hivemind/Tags/4Deanna/Recent
__________________________________________________________
Stairway to Heaven GrfxDziner.com
| Articles on Deanna Cremin... Somerville, MA
Subscribe to:
Posts (Atom)