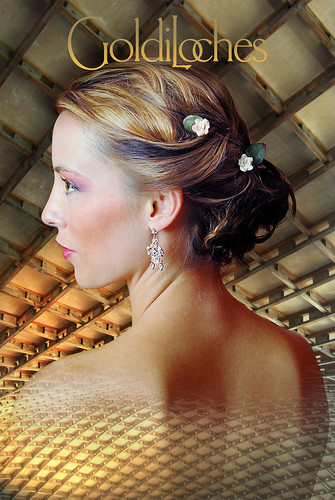
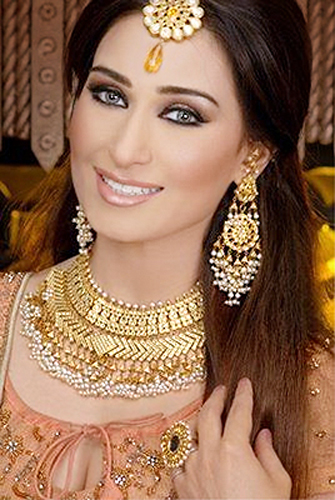
Showing posts with label LassoTool. Show all posts

Saturday, December 11, 2010

As soft as a feather...

198-2a

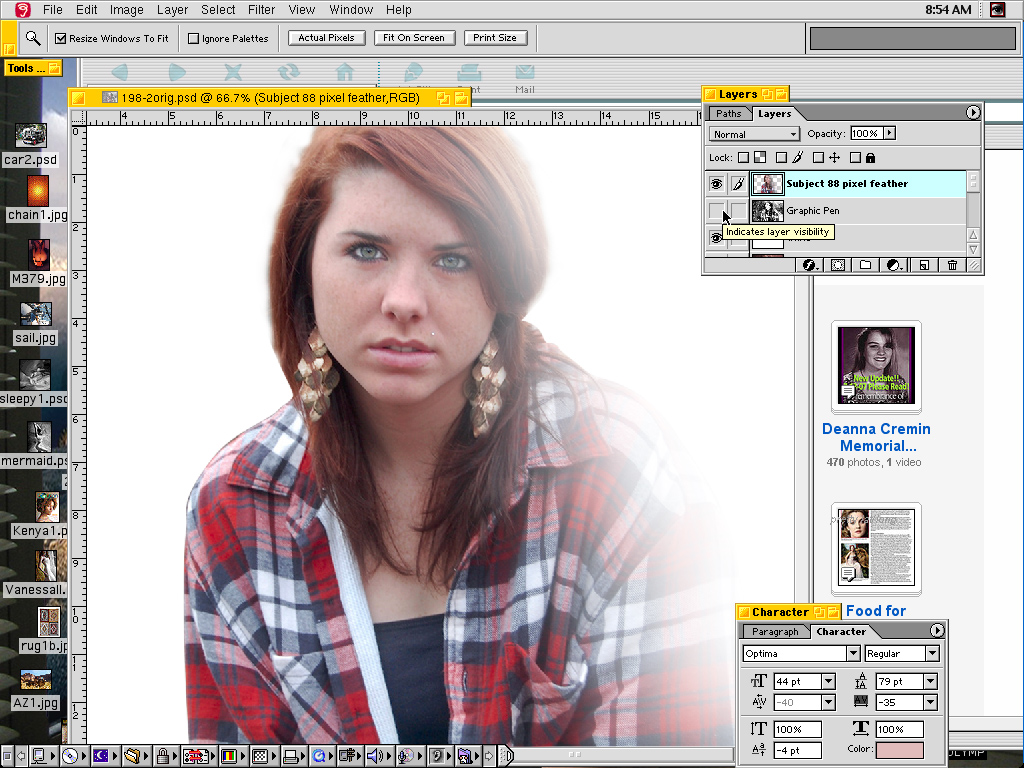
For that edit I did most of the same things I do for portrait work. I used the lasso tool for selections, and the pen tool for the initial selection of the model. That selection is just the outline of the model, and I find the pen tool does that the best. As I have mentioned in other places, it makes a very crisp edge and sometimes to crisp for that portion of he photo. For the quicker selections once the subject has been isolated, are easily done with the lasso tool. The feather amounts always change too depending on what portion of he portrait, and how precise you need an edge.

 To show you a dramatic difference of the finer edge to a softer one, look at these variations of the initial work. Each has also had a graphic treatment done to the underlying background image. The first example use the Graphic Pen effect, and the second usses a Concentric Circle. See how the thickness of the concentric circles create the tone...
198-2b


198-2c
....and do you see how softly the textures blend into the subject? That feather amount is about 300 pixels on the full size edit. It started as a quick selection using the lasso tool. I roughly followed the contour of he subject, and it didn't have to be precise at all because of the very strong feather amount applied.
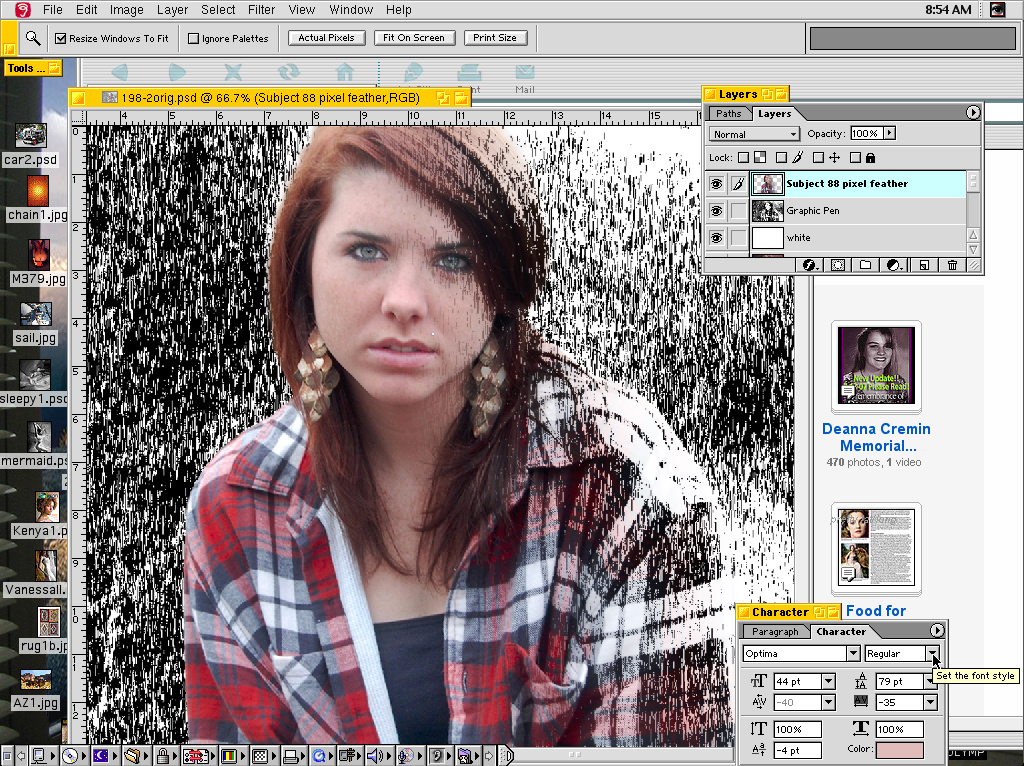
 The effect of having a precise edge on one side contrasted with an extremely soft edge on the other is something that can be used in combination with illustrations, or paintings. It tends to give the illusion of the subject falling into the painting, or coming out of a illustration. Take a look at these screen caps to see the layer stack...
screenGraphicPen1 screenGraphicPen2
You can see the same type of contrasting feather work in this poster for the Sundance Film Festival. It was for an online contest back in 2006, just for fun. Look at the very soft edge where the sky meets the globe, the text for the title also has some very soft feathering, and on a couple layers...
eternal sunshine 2
Deanna Cremin Memorial FoundationGrfxDziner.com | Christmas Carol for Deanna Cremin...

flickr HiveMind | MotherChildSeries
http://fiveprime.org/hivemind/Tags/MotherChildSeries
flickr HiveMind | 4Deanna(recent uploads)
http://fiveprime.org/hivemind/Tags/4Deanna/Recent
__________________________________________________________
Stairway to Heaven GrfxDziner.com
Boston Herald | Deanna Cremin articles | Articles on Deanna Cremin... Somerville, MA
fluffy screenThunderFalconHawk2 [3.29.21] feather waiting m'art IMG_0661 | Cherry Blossom Project iceQueen | rain on me [12.30.19] Yoü & i waiting

Monday, April 12, 2010

Isis • Goddess of MotherHood

isisCropSM
flickr HiveMind | 4 Deanna
Brightness | Is the same Light as to Sound.
Wikipedia | Isis...Egyptian Goddess of maturnity; fertility & nature.


Here is also a link to another edit...and a portion of the editing description. Just click an edit to see the full description....
____________________________________

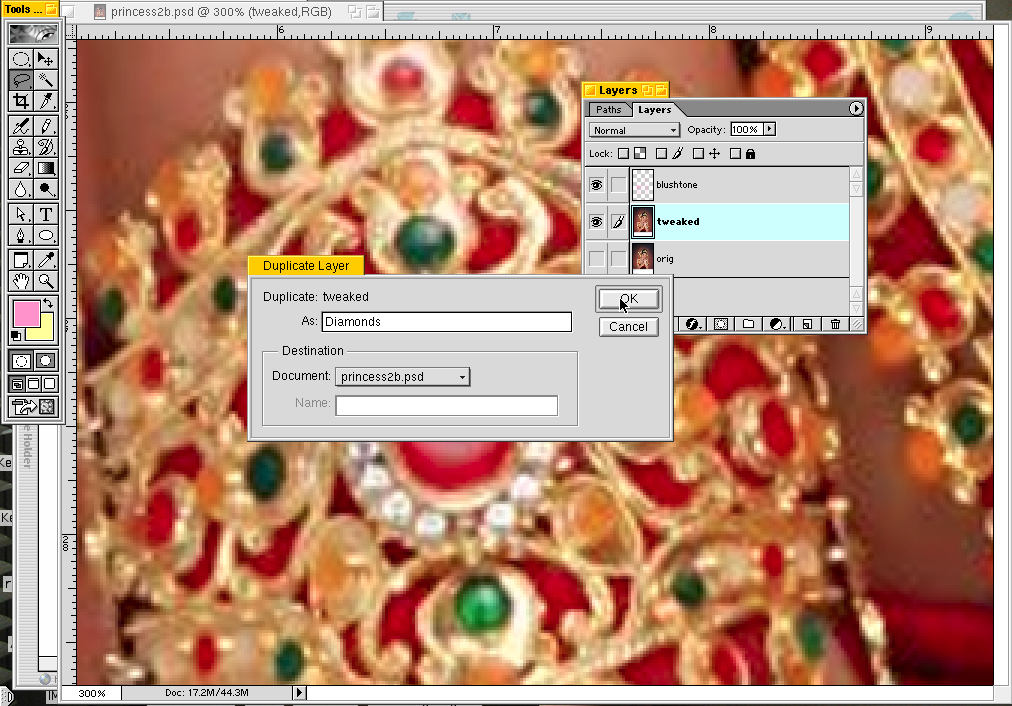
Whenever I work on jewelry it is important to try and sparkle the stones and metal some more than what the original photograph offers. Because of the angle of the light to the angle of the gem stones, some are much less brilliant than others. This can be easily adjusted with layers and having them applied as "Screen" blending mode. For the first layer that we will label Diamonds, I will also be using a Layer Mask. To start, I duplicate the Original Background layer, and name it Diamonds...
sana2b princessScreen1

Then, chose a Layer Mask from the Lyer drop down menu. You see we have two choices, Reveal All and Hide All. Reveal all will give you a white mask, and you paint in black to cover what you do not want to show. Hide All gives you a black mask and you paint in white to reveal the portions you want.

PrincessScreen2 reflectinsdcovs2 Function of Form | Patterns in Nature
_____________________________________

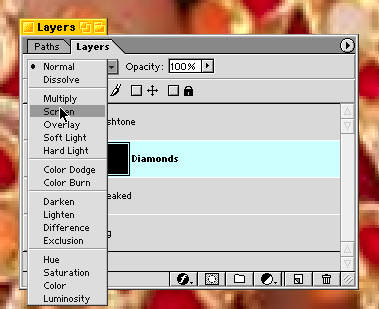
I ended up using the Hide All option, and you see the Layer Mask is all black. Reveal All gives you an all white mask to begin. Then select the layer and apply it as "Screen" blending mode.

sanaNawaz2SM PrincessScreen3
______________________________________

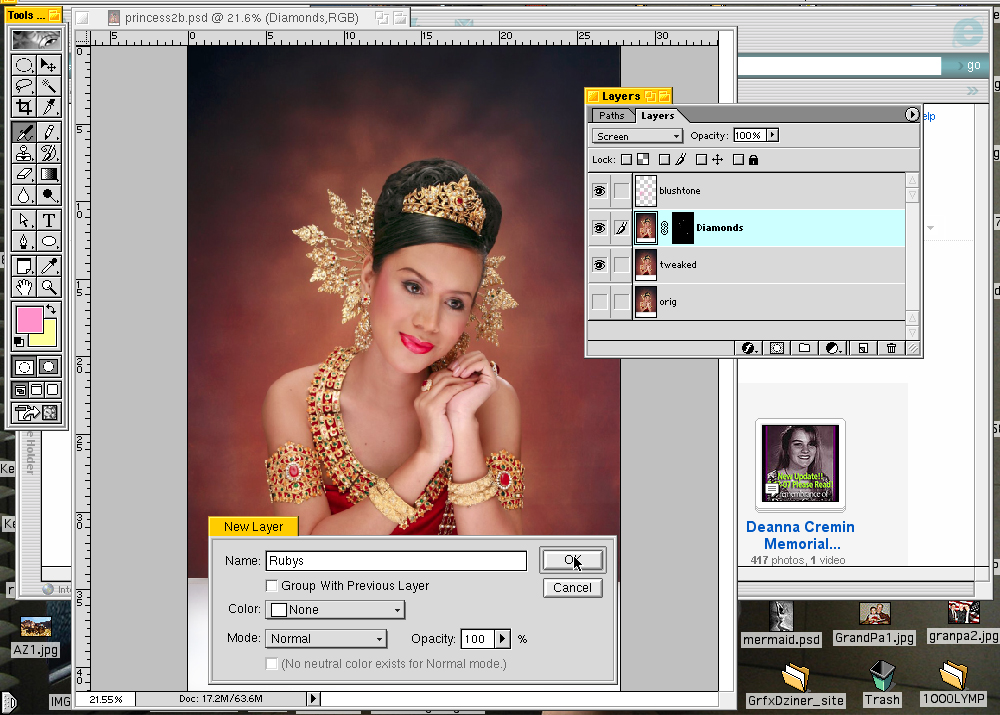
I then added several more layers. One for the Rubys, another for the Emeralds, etc. I eneded up with many layers on this edit, so having them named was helpful.

I only had a Layer Mask for the Diamonds one, because I included some definition of the gold work too. The other gem stone layers were applied as "Screen" blending and I used very light tones of the color to paint with. A pale pink for the Rubys, and a pale bright green for the Emeralds. I also duplicated the layers once they were done and applied the duplicates as "Soft Light" blending mode and a little stronger opacity. This punched up the contrast, and gave the gems more brilliance.

PrincessScreen4 reemaKahn2

Thank you so very much for letting me work on this stunning photograph of this magnificent woman and her jewels. I hope you find my effort worthy of her.

isis2b
cornersFastahBoston [trinity] sketchFastah [w/Orion's Belt]

~Candlelight Vigil~ Deanna Cremin
Investigator/Reporter - Bob Ward
My Fox Boston | Fox25 News - Monday, March 29, 2010


check out this blog too from the
Deanna Cremin Memorial Foundation:
GrfxDziner.com | Fade to Black...
http://GrfxDziner.blogspot.com/2010/02/fade-to-black.html

flickr HiveMind | MotherChildSeries
http://fiveprime.org/hivemind/Tags/MotherChildSeries
flickr HiveMind | 4Deanna(recent uploads)
http://fiveprime.org/hivemind/Tags/4Deanna/Recent

...and also...
Fields of Gold...
GrfxDziner.com | Blogger GrfxDziner:
http://GrfxDziner.blogspot.com/2009/05/fields-of-gold.html


Deanna Cremin Memorial FoundationGrfxDziner.com | Christmas Carol for Deanna Cremin...
Deanna Cremin Memorial Foundation | Recent Uploads
__________________________________________________________
Stairway to Heaven GrfxDziner.com
Boston Herald | Deanna Cremin articles | Articles on Deanna Cremin... Somerville, MA


Screen shot 2013-01-06 at Model Town

Wednesday, April 29, 2009

Red sky at night...

GrfxDziner | fork2
fork2

fiveprime.org/hivemind/Tags/SkyEffect/
fiveprime.org/hivemind/Tags/Deanna,Cremin/
_________________________________________________________

This is for the Fix My Pic Please group.
From an original by Umbra Letum titled, At the fork in the river.
...and part of the monthly before and after forum...
Photo fixes October 2008:
www.flickr.com/groups/FixMyPicPlease/discuss/721576076272...

...and also included in this discussion thread from the
Nikon Digital Learning Center:Assignment...Fall Color
www.flickr.com/groups/NikonDigitalLearningCenter/discuss/...
(dial-up warning - long thread w/images)

Here is a link to the original from Umbra Letum:


www.flickr.com/photos/59197977@N00/2061295154/in/pool-404...

I loved the colors of the landscape in this photo, and thought I would rework the sky some. I used the lasso tool with a very strong feather on the original size image to select portions and add just a bit of contrast. I then added some sections of new sky from a couple other images...again using the lasso tool to select the portions.

I had these as regular mode layers and soft light mode layers and different amounts of opacity. Thank you Umbra Letum for letting me work on your wonderful photo.

Tutorials | Photo Editing Selection Tools | Fix My Pic • Please Teach Me :)
__________________________________________________________


RedGirl2b

RedGirl2a RedGirl2b redGirl2c
Tuz Lake (Salt Lake) | Turkey

I used the Pen Tool to isolate and select the subject. The versatility and precision of the Pen Tool allow for any possible selection. It will create the smoothest and most gentle curves. The paths that are created ar in turn used for selection work. I can simply and quickly modify the selection by expansion, contraction, etc....feather it a bit, and then use the selection to trap against the edge of the subject. I can then easily use the airbrush eraser to give the edge any amount of softness I desier. The Pen Tool is a very crisp line, but with some easy adjustment, and edge is possible.

I also used the Sky Effect technique to add in a new sky where there once was non. This is prettys simple, especially once the subject is isolated. Just add the sky on a new layer, and apply as one of the Light Blending modes....such as Screen, Multiply, Soft Light, Hard Light, etc. Blending multiple times with some softe feather work will allow for a complex sky too. On the featured image I created some spheres and this too was on multiple layers, some of which were the light blending modes.


flickr HiveMind PenTool
flickr HiveMind SkyEffect

Here is some info on the Sky Effect...
www.flickr.com/photos/GrfxDziner/2823116712/#comment72157...
...and the Pen Tool...
www.flickr.com/photos/GrfxDziner/2509280338/#comment72157...

Automatic Download of 3-Page tutorial in .PDF format:
www.GrfxDziner.com/lessons/Lesson4AFULL.PDF

Automatic Download of 4-Page tutorial in .PDF format:
www.GrfxDziner.com/lessons/Lesson4BFULL.PDF


__________________________________________________________

All My Life | One by One GrfxDziner.com | Deanna Cremin Memorial Foundation
__________________________________________________________
Stairway to Heaven GrfxDziner.com
Boston Herald | Deanna Cremin articles | Articles on Deanna Cremin... Somerville, MA


flickr HiveMind | MyFoxBoston (recent uploads)
http://fiveprime.org/hivemind/Tags/MyFoxBoston/Recent