
This was edited with permission from a
wonderfully composed original by auntiekrisw, titled 016.
Automatic Download of 5-Page tutorial from GrfxDziner.com
Lesson2B: the Polygonal Lasso Tool | 12.9MB .pdf file.
Note, when you click the link, the file will begin to download.
Forums | GrfxDziner.com
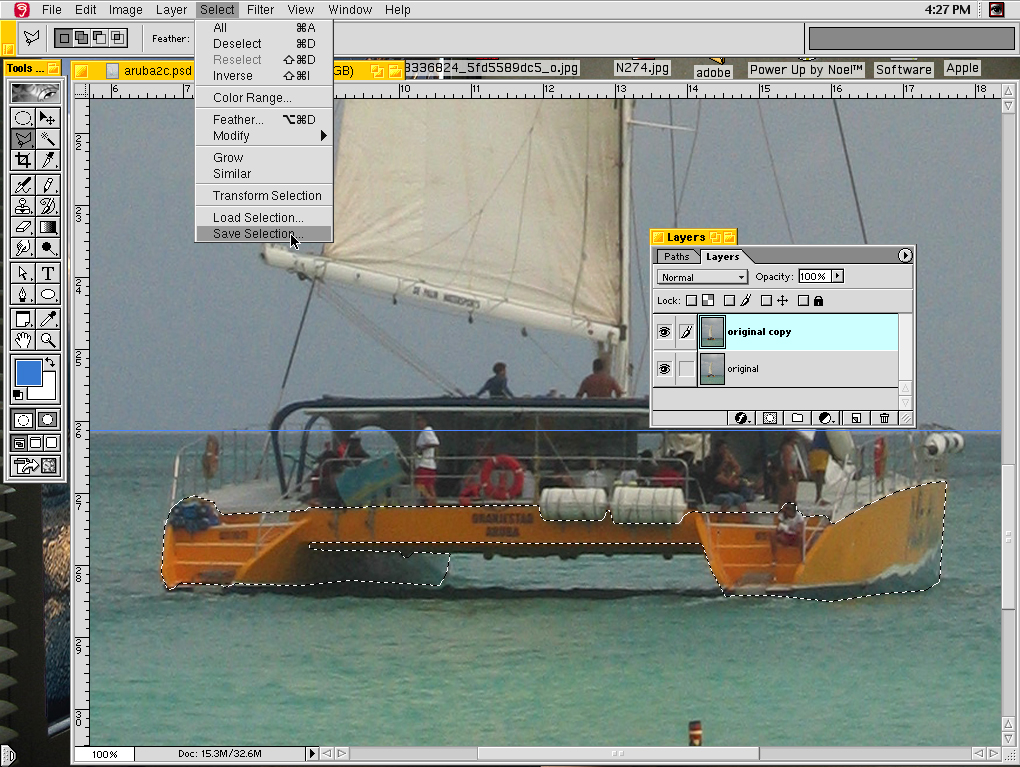
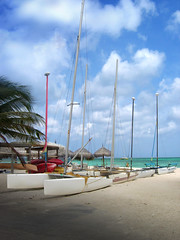
This is one of my all time favorite shots! I thought her composition was incredible, and she follows the rule of thirds so well. I used the Polygonal Lasso Tool to select the orange hull of the boat. I saved my selection off, so I would have it for later if needed. I then added some clouds. I like to have a bunch of clouds and backgrounds that I can use on other shots...
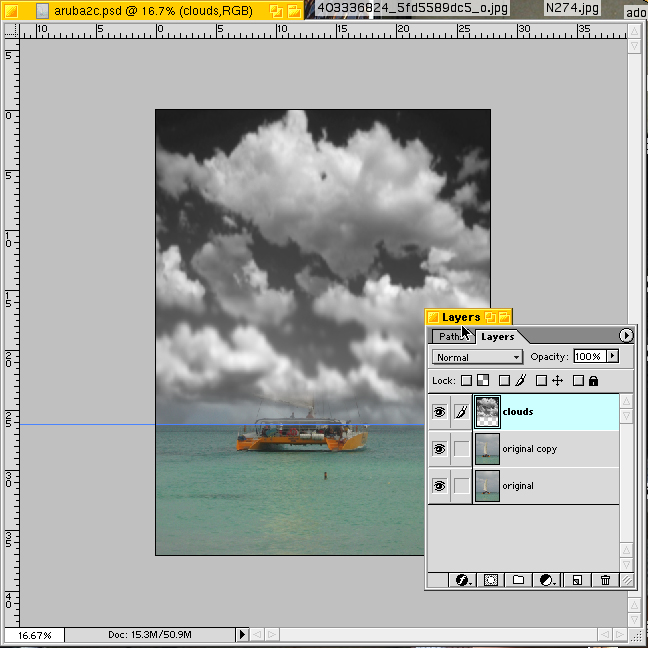
As you can see, these covered the sail and rigging. No biggie though. Shut off the layer, use the polygonal lasso tool to select just the sail and mast. It may look curved, but as you zoom in on it, it is straight lines. Perfect for the polygonal tool. I saved that selection.
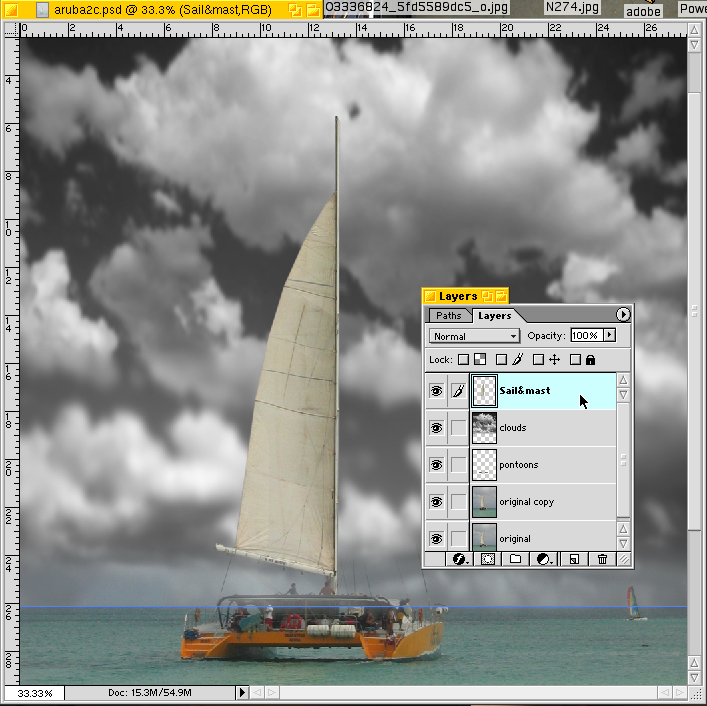
Now I load the first selection back in. I copied this to a new layer, and added some contrast and brightness to punch up the orange. I loaded in the sail&mast selection too and copied that to another layer, and put it above the clouds...which I then turned on...

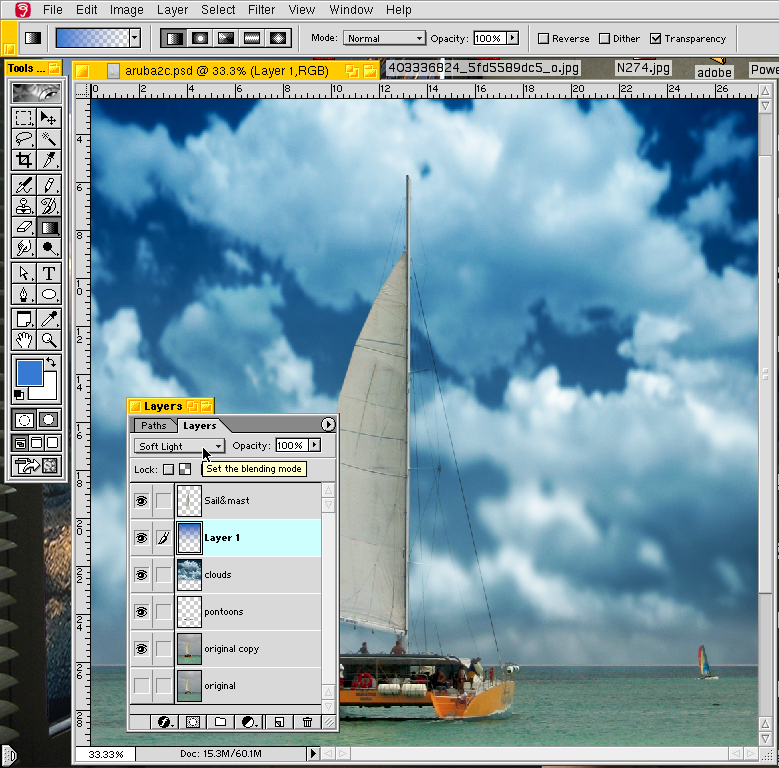
Okay, this worked pretty well, and was quick. BUT, what about all the rigging lines? Jeeez, that is gonna take foreva to select those tiny little things, you gotta be kiddin' me...right?
Hah! there is a very simple way to bring all of the rigging lines back. Simply turn the "clouds" layer to a "Hard Light" blending mode. Wheeew! Thank goodness that worked:) But, seriously, the light modes for layers will allow you to have details below and burn through. With the sail and mast on top as normal it works great. One thing that helps alot too, is that the sky in auntiekrisw's original is nice and neutral, and helps with the blending. If you have a more cluttered background, just add a new layer of white below the light mode layer, and your image will work just like this did.
Now I wanted to add some color into the clouds and sky. So I had that layer highlighted and used the "color Balance" function to add blue, cyan, and some magenta. I also added anothe layer and used the gradient tool for a blue gadient. I applied this layer as "Soft Light" to blend with the clouds......

whooooah! A little too much maybe. But, I can easily tone it down, because it is layered. Some desaturation, some brightness to the ocean and pushed the green a bit, and added a blur to the foreground. Thank you so much auntiekrisw, for letting me work on your amazing photo. It has always been one of my favorites :)
Here are a couple more we did for auntiekrisw, too...
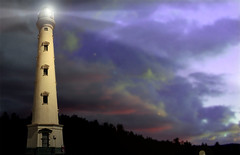

The lighthouse shot is not from her, but she actually shot the exact same lighthouse while in Aruba. She also has an incredible lighthouse shot she took up in Portland Maine, I believe....
Portland Lighthouse | flickr.com • auntiekrisw
~Candlelight Vigil~ Deanna Cremin


Deanna Cremin Memorial Foundation | Recent Uploads
flickr HiveMind | MotherChildSeries
http://fiveprime.org/hivemind/Tags/MotherChildSeries
flickr HiveMind | 4Deanna(recent uploads)
http://fiveprime.org/hivemind/Tags/4Deanna/Recent
__________________________________________________________
Stairway to Heaven GrfxDziner.com
![oneDay [7.23.20] comet & Venus](https://live.staticflickr.com/31337/50152656542_186d350cd1_w.jpg)

![[p]article NOTE](http://www.GrfxDziner.com/deanna33195a.jpg
)


![egret2a [GrfxIntroSWF]](https://live.staticflickr.com/153/335649894_87c59b4945_m.jpg)


No comments:
Post a Comment